
Lotus Position (Padmasana): Complete Beginner-to-Advanced Guide
Introduction to Lotus Position
The Lotus Position (Padmasana) is one of the most iconic, recognizable, and transformative yoga postures practiced across the world. Often associated with deep meditation, mindfulness, and spiritual awareness, this seated pose symbolizes stability, tranquility, and inner harmony.
You’ve probably seen it in meditation imagery, yoga studios, or spiritual illustrations—someone sitting calmly with crossed legs, a straight spine, and a peaceful expression. While it appears effortless and serene, achieving this posture safely requires patience, gradual flexibility, and proper technique.
Across wellness centers in Europe, traditional yoga schools in India, and mindfulness retreats throughout Asia, this posture is widely used to cultivate concentration, relaxation, and mental clarity.
However, here’s a reality many guides fail to highlight:
Attempting lotus position prematurely—without sufficient hip mobility—can lead to discomfort, strain, or even knee injury.
That’s why this guide is designed differently.
What Is Lotus Position (Padmasana)?
Lotus position, also known as Padmasana, is a traditional seated yoga posture where:
- Each foot is placed on the opposite thigh
- The spine remains upright and elongated
- The hands rest on the knees, often forming a mudra
This posture creates a stable, symmetrical foundation for meditation and breathing exercises.
Unlike casual sitting positions, Padmasana is intentionally structured to minimize movement, enhance alignment, and promote sustained stillness.
Where Lotus Position Is Used
The Lotus Posture is commonly practiced in:
- Meditation techniques such as mindfulness and Vipassana
- Breathing practices (pranayama)
- Traditional yoga sessions and asana sequences
- Spiritual rituals and relaxation exercises
Its widespread use across cultures reflects its effectiveness in achieving mental and physical balance.
Why Lotus Position Is Unique
Compared to ordinary sitting postures, lotus position offers several distinct advantages:
- Provides a stable and grounded base
- Minimizes unnecessary physical movement
- Encourages mental focus and awareness
- Facilitates deep, controlled breathing
Core principle: A still body supports a calm and focused mind
Benefits of Lotus Position (Padmasana)
Physical Benefits
Regular practice of lotus position can:
- Improve posture and spinal alignment
- Enhance hip flexibility and joint mobility
- Strengthen the knees and ankles when performed correctly
- Boost blood circulation throughout the lower body
- Support digestive function and internal organ health
Additionally, the symmetrical positioning of the legs promotes muscular balance and reduces uneven tension.
Mental Benefits
Padmasana has a profound impact on mental well-being:
- Reduces stress, anxiety, and mental fatigue
- Enhances concentration and cognitive clarity
- Promotes emotional stability and calmness
- Supports mindful breathing and relaxation
This posture is widely used in meditation because it helps maintain alert relaxation—a state where the mind is calm yet attentive.
Advanced Benefits
For experienced practitioners, lotus position can:
- Enable extended meditation sessions without discomfort
- Strengthen the connection between mind and body
- Balance the Nervous System
- Increase self-awareness and inner consciousness
Over time, consistent practice can lead to a deeper sense of presence and mental discipline.
Step-by-Step Guide: How to Do Lotus Position Safely
Follow these steps gradually and mindfully. Avoid rushing.
Starting Position
- Sit on the floor with legs extended forward
- Keep your spine straight and shoulders relaxed
- Engage your core slightly for support
First Leg Placement
- Bend your right knee slowly
- Place your right foot onto your left thigh
- Ensure the sole faces upward and rests comfortably
Second Leg Placement
- Bend your left knee carefully
- Place your left foot onto your right thigh
Final Alignment
- Keep your spine upright and neutral
- Relax your shoulders and jaw
- Place hands on knees (Chin Mudra or relaxed position)
Important: Never force your legs into position
Lotus Position Progression Plan
| Level | Practice | Duration |
| Beginner | Cross-legged sitting | 1–2 weeks |
| Intermediate | Half lotus (Ardha Padmasana) | 3–6 weeks |
| Advanced | Full lotus position | 2+ months |
Flexibility develops progressively—consistency is key.
Proper Form & Alignment
Maintaining correct posture is essential for safety and effectiveness.
Key Alignment Principles
- Keep spine straight but not rigid
- Allow knees to move toward the ground naturally
- Place feet gently without pressure
- Ensure movement originates from the hips
Golden rule: Flexibility must come from the Hips, not knees
Breathing Technique in Lotus Position
Breathing plays a critical role in this posture.
Basic Breathing
- Inhale deeply through the nose
- Exhale slowly and smoothly
- Maintain a steady, natural rhythm
4-4 Breathing Method
- Inhale for 4 seconds
- Exhale for 4 seconds
This technique promotes relaxation and nervous system balance.
Muscles Targeted in Lotus Position
Padmasana engages multiple muscle groups:
- Hip flexors and rotators
- Glute muscles
- Inner thigh muscles (adductors)
- Knees and ankle stabilizers
- Core muscles for posture
Variations of Lotus Position
Not everyone can achieve full lotus immediately, so variations are important.
Beginner: Easy Pose (Sukhasana)
- Simple cross-legged posture
- Comfortable and accessible
- Ideal for beginners
Intermediate: Half Lotus (Ardha Padmasana)
- One Foot placed on opposite thigh
- Reduced joint pressure
- Safer transition to full lotus
Advanced: Full Lotus (Padmasana)
- Both feet placed on thighs
- Requires significant flexibility
- Best for experienced practitioners
Full Lotus vs Half Lotus (Comparison)
| Feature | Full Lotus | Half Lotus |
| Difficulty | High | Medium |
| Flexibility | Very High | Moderate |
| Injury Risk | Higher | Lower |
| Best For | Advanced | Beginners |
Common Mistakes to Avoid
Avoid these frequent errors to prevent injury:
Forcing the Knees
Can cause serious joint damage
Rounded Back
Reduces breathing efficiency
Skipping Warm-Up
Leads to stiffness and strain
Holding Breath
Creates tension and discomfort
Best Warm-Up Poses Before Lotus Position
Preparing your body is essential.
Recommended Warm-Ups
- Butterfly Pose
- Pigeon Pose
- Seated Forward Fold
- Hip-opening exercises
These movements prepare hips, knees, and ankles for deeper flexibility.
Safety Tips for Lotus Position
Practice safely with these guidelines:
- Always warm up beforehand
- Avoid forcing your body into position
- Use cushions or props if needed
- Practice on a soft surface
- Stop immediately if pain occurs
Contraindications
Avoid or modify the pose if you have:
- Knee injuries or ligament issues
- Severe hip stiffness
- Ankle Pain or instability
- Recent surgery
Seek professional guidance if uncertain.
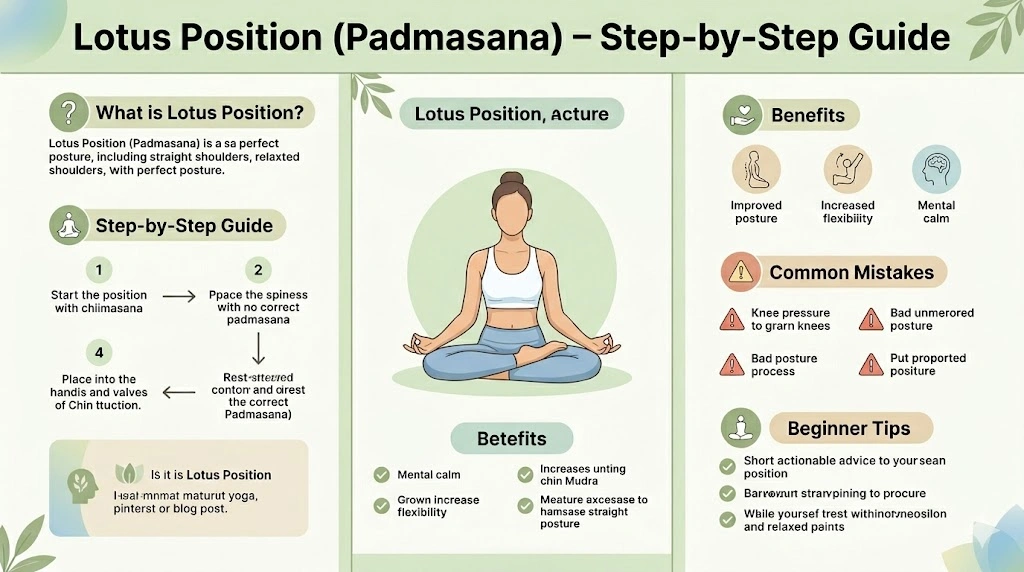
Beginner Tips for Lotus Position
If you’re starting out:
- Begin with 2–5 minutes daily
- Practice consistently
- Start with half lotus
- Focus on gradual flexibility
Remember: Progress matters more than perfection
Duration & Frequency Guide
| Level | Duration | Frequency |
| Beginner | 1–5 minutes | Daily |
| Intermediate | 10–20 minutes | 4–5x/week |
| Advanced | 30+ minutes | Daily |
Lotus Position for Meditation
This is where the posture becomes truly powerful.
Meditation Setup
- Keep spine naturally upright
- Relax shoulders and facial muscles
- Close eyes gently
Focus Techniques
- Observe your breath
- Repeat a mantra
- Watch thoughts without attachment
Goal: Remain still, aware, and relaxed
Science Behind Lotus Position
Scientific studies suggest:
- Upright posture enhances oxygen intake
- Stable sitting reduces distractions
- Controlled breathing calms the nervous system
This aligns with ancient yogic philosophy:
Still body = still mind
Diet Tips to Improve Flexibility
Nutrition supports mobility.
Helpful Guidelines
- Stay Hydrated
- Eat anti-inflammatory foods
- Include magnesium-rich nutrients
- Avoid heavy meals before practice
Simple Home Practice Routine
Daily Routine (15–20 Minutes)
- Warm-up (5 minutes)
- Hip openers (5 minutes)
- Lotus practice (5–10 minutes)
Consistency produces the best results.
Pros & Cons of Lotus Position
Pros
- Ideal for meditation
- Improves posture
- Enhances flexibility
- Boosts focus
Cons
- Difficult for beginners
- Risk of knee strain if done incorrectly
- Requires regular practice
FAQs
Yes, it requires flexibility and patience.
Only if forced, especially for knees.
Yes, start with half lotus or easy pose.
Start with 2–5 minutes and increase slowly.
No. Comfort is more important than posture.
Conclusion
The Lotus Position (Padmasana) is more than just a yoga posture—it is a powerful tool for cultivating mental clarity, physical stability, and inner peace.
Yes, it may feel challenging at first.
But with the right approach:
- Build flexibility progressively
- Maintain proper alignment
- Listen carefully to your body